Meth Sampling Photo Evidence \u2013 What Happens When the Surface Is Disturbed?
Methamphetamine surface testing is intended to assess residue on a defined surface area. But what happens when the sampling process visibly alters the paint, stain or coating? Buried Truth documents photographic examples of sampling locations where visible surface changes remained after sampling.
Real-World Sampling Photographs
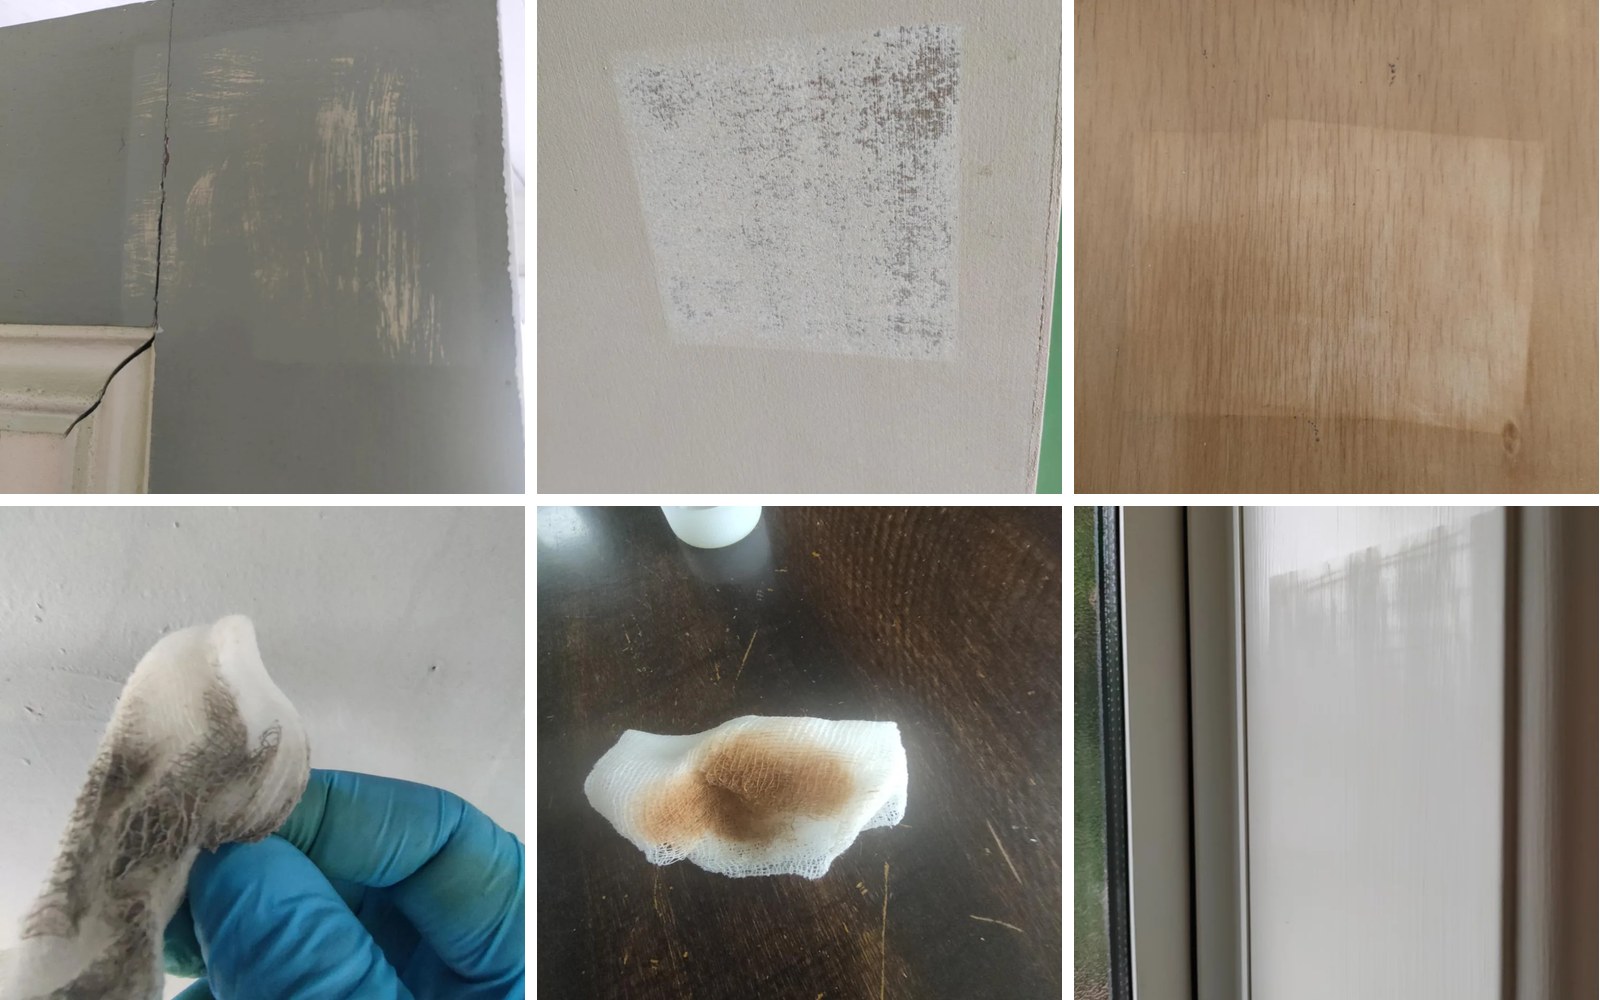
The following photographs from Buried Truth document sampling locations where visible surface changes remained after testing. Together they demonstrate why the condition of the sampling surface, the sampling method, and any disturbance of the coating should be carefully documented.
Visible Surface Disturbance
A visible sampling zone remains on the painted surface after testing. Where sampling alters or breaches a coating, the condition of the surface and sampling method should be recorded.
Identified in Buried Truth as Figure 1, “Paint Removal from Test Area.”
Paint Abrasion at the Sampling Location
Visible abrasion and deterioration around a sampled area illustrate why samplers need to distinguish an intact surface wipe from sampling that may collect coating or underlying material.
The book identifies this example as exhibiting surface abrasion and substrate cracking.
Multiple Visible Sampling Zones
Repeated square sampling areas can be seen across the finished timber. Changes in colour or sheen after sampling can indicate interaction between the sampling process and the surface coating.
Do not state from the photograph alone that the laboratory result was invalid.
Surface Versus Sub-Surface Sampling
When material is visibly removed beyond the original surface coating, that distinction can become important when interpreting the laboratory result.
Coating Material Visible on the Sampling Wipe
Visible material transferred to a sampling wipe is an important field observation. It should be documented alongside the sampling location and laboratory submission information.
Surface Material Transferred During Sampling
Surface condition can materially affect what is collected during wiping. Photographs provide a contemporaneous record of what occurred at the sampling location.
Important: The sample areas shown in these photographs are from on-site inspections documented in Buried Truth. They were not indicated by, and were not performed by, EnviroCheck. These images are presented as educational photographic evidence of what can occur at sampling locations.
Why the Chain of Custody Matters
A laboratory generally analyses the material that is submitted to it. It may not have first-hand knowledge of what happened at the property.
That makes field documentation critical.
If a sampler intentionally performs a sub-paint or destructive sample, that fact should be clearly identified on the laboratory analysis request or chain-of-custody documentation.
Likewise, if paint, stain or another coating is unexpectedly disturbed during sampling, the condition should be photographed and recorded.
This helps the laboratory, report writer, property owner and any later reviewer understand exactly what the analytical result represents.
This matches a major theme of Buried Truth: the book says that missing field information can cause the distinction between surface exposure and material disturbance to be lost as the sample moves from property to laboratory and into the final report.
The Sampling Documentation Chain
Proper field documentation ensures everyone receiving the result understands what was actually sampled. Steps 2, 5 and 6 are highlighted because they are where surface disturbance and sub-paint sampling are most often missed.
Surface Sample or Sub-Paint Sample?
| Standard Surface Assessment | Sub-Paint / Destructive Investigation |
|---|---|
Intact accessible surface | Investigation below surface coating |
Designed to assess accessible residue | Designed to investigate underlying material |
Surface condition photographed | Destructive method documented |
Normal sampling area recorded | Clearly identify as sub-paint |
Result interpreted as surface residue | Do not present as ordinary surface result without explanation |
The Difference Must Be Clear
Sub-paint investigation can have a legitimate forensic purpose, particularly where historic contamination or subsequent repainting is being investigated.
The issue is not that sub-paint testing should never occur. The issue is ensuring that everyone receiving the result knows what was actually sampled.
That distinction is consistent with Buried Truth’s broader discussion that sub-paint investigation should be explicitly disclosed rather than presented indistinguishably from ordinary surface sampling.